Questions

[5 marks Questions]

🎯

Test yourself on this topic

5 questions · timed · auto-graded

Question 15 Marks
Complete the blank spaces using words from the list. You should use each word only once. Websites, slide, PowerPoint, presentation, templates, handouts, projector.
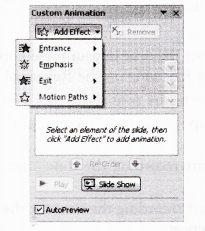
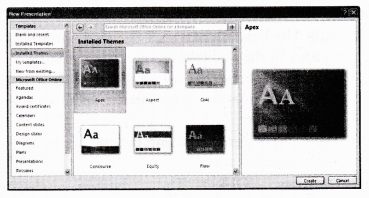
MS (1)………………… is a (2)………………… program that lets you make and show slide shows. These can be viewed on the computer screen or through a multimedia (3)………………… Copies of the presentation, called (4)………………… that can be printed out and given to the audience so that, they can make their own notes. Presentations are made up of a series of pages, called (5)………………… as well as text, slides may incorporate graphics, animated images , sounds and video clips, graphs, charts and even links to (6)………………… Most presentation packages provide a set of themes and (7)………………… which make it easy to create professional looking presentations with little skill or knowledge. They also offer the facility to add slide transition, timing and animations, which bring a presentation’s to life.
Answer
  1. PowerPoint
  2. presentation
  3. projector
  4. handouts
  5. slide
  6. Websites
  7. templates
View full question & answer
Question 25 Marks
Write the steps to print handouts in PowerPoint presentation
Answer
Printing Slide Handouts:
We have already studied about the handouts view of presentation, it could help the audience in getting idea of your’s easily. A presentation can be printed in the form of handouts-with one, two, three, four, six or nine slides on a page.
For printing handouts, you need to do the following:
  1. Open the presentation for which you want to print handouts.
  2. Click the Microsoft Office button, click the arrow next to Print option and then click Print Preview.
  3. In the Page Setup group, click the arrow under Print What: and then select the handout layout option that you want from the list.
  4. To specify the page orientation, click the arrow under Orientation and .then click Landscape or Portrait.
  5. Click Print.
View full question & answer
Question 35 Marks
Which tab and command let you insert animations in your slide? Write the steps for applying animations in your presentation.
Answer
Animating Text and Objects:
We can give sound effects or visual effects, including movement to the text or objects in a presentation. Animation can be used to focus on important points, to control the flow of information and to increase viewer interest in a presentation. Built-in animation effect can be added in Office PowerPoint 2007 presentation by do the following:
  1. Select the text or object that you want to animate.
  2. On the Animations tab, in the Animations group, select the animation effect that you want from the Animate list.
To apply a custom animation effect in Office PowerPoint 2007, do the following:
  1. Select the text or object that you want to animate.
  2. On the Animations tab, in the Animations group, click Custom Animation.
In the Custom Animation task pane, click Add Effect and then do one or more of the following:
  1. To make the enter text or object with an effect, point to Entrance and then click any effect.
  2. To add an effect, such as a Spin effect, to text or an object that is already visible on the slide, point to Emphasis and then click an effect.
Image
  1. To add an effect that makes text or an object leave the slide at some point, click to Exit and then click an effect.
  2. To add an effect that makes text or an object move in a specified pattern, click to Motion Paths and then click a path.
To specify how the effect is applied to your text or object, right-click any custom animation effect in the Custom
Animation list and then click Effect Options.
Do one of the following:
  1. To specify settings for text, on the Effect, Timing and tabs, click the options Animate text from Effect tab to use to animate the text.
  2. To specify settings for an object, on the Effect and Timing tabs, click the options that you want to use to animate the object.
Effects appear in the Custom Animation list in the order that you add them.
View full question & answer
Question 45 Marks
Explain the various views of a slide available in PowerPoint 2007.
Answer
In Microsoft Office PowerPoint 2007, different views of a slide are used to edit, print and deliver a presentation. PowerPoint slide views can be found in two places as follows:
  1. On the View tab, in the Presentation Views group, where all views are available.
  2. On an easy-accessible bar, at the bottom of the PowerPoint window, where the main views (Normal, Slide Sorter and Slide Show) are available. Different types of views available in PowerPoint 2007 are explained below:
    1. Normal View: This is the main editing view, where you write and design your presentations, i.e. actual screen which is displayed. The view is also known as Slide view. A Normal view is the default view size for the screen.
    2. Slide Sorter View: It provides a view of slides in thumbnail form. This view makes it easy to sort and organize the sequence of the slides at the time of creating presentation and also, at the time of preparing presentation for printing.
    3. Notes Page View: In the Notes Page view, the notes pane is located just below the slide pane. Here, notes that apply to the current slide can be typed. Later, these notes can be printed and referred while giving actual presentation. Notes can also be printed to handout to the audience or included in a presentation that is delivered to the audience or posted on a Web page.
    4. Slide Show View: This is used to deliver a presentation to the audience. Slide Show view takes up the full computer screen, like an actual presentation. In this view, you can see your presentation, the way audience wants. This view enables you to see how graphics, timings, movies, animated effects and transition effects will look during the actual presentation. To exit Slide Show view, press Esc key from the keyboard.
    5. Master View: The Master views include Slide view, Handout view and Notes view. They are the main slides that store information about the presentation, including background color, fonts effects, placeholder sizes and positions. The key benefit to working in a Master view is that on the Slide Master, Notes Master, or Handout Master, you can make universal style changes to every slide, notes page, or handout associated with the presentation.
View full question & answer
Question 55 Marks
What are the different ways in which you can start creating a new presentation? Write steps for each.
Answer
Creating New Presentation:
For creating a new presentation in MS-PowerPoint, there are two options available to make a selection of creating new presentation:
1. Creating Blank Presentation
For creating a blank presentation, do the following:
  1. Click on Office button and then click New from the menu that appears.
  2. A New Presentation dialog box will appear.
  3. Select Blank Presentation and click on Create button.
A blank presentation with one slide will be created. Also, further slides can be added to the presentation and can change the layout of an existing slide as well.
2. Creating Presentation using Themes
You can quickly and easily format an entire presentation to give it a professional and modern look by applying a theme.
In MS-PowerPoint 2007, you can apply theme using these two methods which are as follows:
Method 1
    1. Click on Office button and then, click New from the menu that appears.
    2. A New Presentation dialog box will appear.
    3. From the right hand side page, select Installed Themes under Templates.
    4. Select any one of the theme as per the users choice.
    5. Click Create button.


ImageMethod 2
  1. Select Design tab under the MS-PowerPoint 2007 ribbon menu system.
  2. Select Themes group under this tab.
  3. Select any one theme as per the choice.
  4. Effects will be automatically applied on all the slides.
Saving a Presentation
Procedure for saving a presentation is same as saving a MS-Word document and MS-Excel workbook. For saving your presentation, do the following:
  1. Click on the Microsoft Office button and then, click Save As option from the menu that appear.
    Or
    Press Ctrl+S from keyboard.
  2. Save As dialog box will appear, in the File name box, enter a new name to save the file.
  3. Then, click Save button.
View full question & answer